This guide will help you upgrade from osTicket (which you already have installed in a subdomain on your self-hosted Linux web server) to osTicket Awesome.
If you are using a Windows IIS server, or are installing to a directory (rather than a subdomain), please go back to this menu.
When your osTicket was first installed, you (or the person who installed it) chose the name of the subdomain that it was installed into. Common names that people use are osticket, helpdesk or support.
For the purpose of these instructions we will assume that your website is www.your-domain.com and your current osTicket installation is in www.support.your-domain.com
Go to Admin Panel > Manage > Plugins
Make a note of any plugins that are installed and Enabled

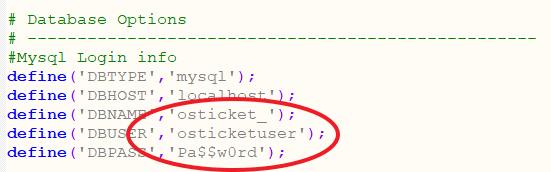
Open include/ost-config.php
Make a note of your Database Options
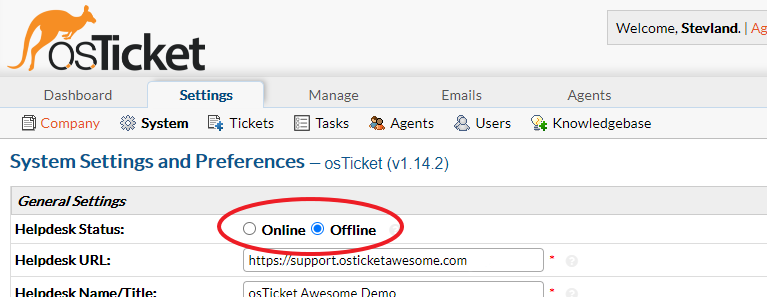
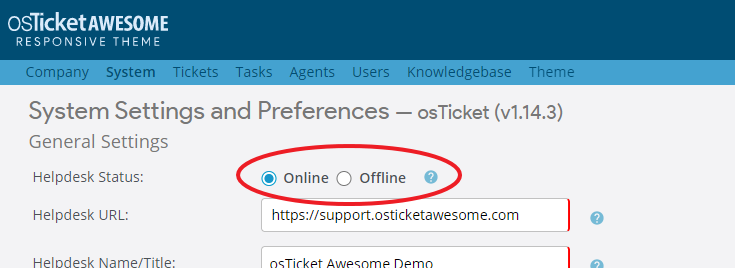
Go to Admin Panel > Settings
Switch your old osTicket to Offline
Backup your database one of these methods
-
cPanel
In your cPanel, go to Files > Backup Wizard
Click Backup > MySQL Databases > select your database
Save the file to your local computer
-
Plesk
Go to subdomain.yourdomain > Databases
Click Export Dump
Choose a directory to save the backup to. If you additionally want to download a copy of the database to your local computer, select Automatically download dump
-
phpMyAdmin
Open phpMyAdmin and select your database
Click Export
Select Custom
Make sure all Tables are selected
Select Add Drop Table
Click Go
-
CLI
Terminal
# Create a backup directory
# mkdir ~/osticket-db-backup
# Dump the database
# mysqldump osticket_ -u root -p --single-transaction --quick --lock-tables=false > ~/osticket-db-backup/osticket-backup-$(date +%F).sql
Navigate into your subdomain root directory. Create a support-old directory to backup your old osTicket files. Move the old osTicket files into that directory.
-
cPanel
Go to cPanel > File Manager
Enter your subdomain.yourdomain.com directory
Create a support-old directory
Move all of the other directories and files into the support-old directory (except cgi-bin, if present)
-
Plesk
Go to subdomain.yourdomain.com > File Manager
Create a support-old directory (except cgi-bin, if present)
Move all of the other directories and files into the support-old directory

-
FTP
Connect to subdomain.yourdomain.com
Create a support-old directory
Move all of the other directories and files into the support-old directory
-
CLI
Terminal
# mkdir support-old
# mv !(support-old) support-old
Download and extract the latest osTicket Awesome .zip. Move the contents of the upload folder to your subdomain root directory. Delete the upload folder.
-
cPanel
Download the osTicket Awesome installation .zip to your computer
Upload .zip to your subdomain.yourdomain.com directory
Extract the .zip file
Open the upload directory
Click Select All to highlight all of the files and then drag them into your subdomain.yourdomain.com directory
Go back to your subdomain root directory
Select upload, README.txt and the osTicket Awesome .zip and click Remove
-
Plesk
Download the osTicket Awesome installation .zip to your computer
Go to subdomain.yourdomain.com > File Manager
Upload .zip to your subdomain
Extract the .zip file
Open the upload directory
Highlight all of the files > Move > select your subdomain > OK
Go back to your subdomain root directory
Select upload, README.txt and the osTicket Awesome .zip and click Remove
-
FTP
Download the osTicket Awesome installation .zip to your computer
Extract the .zip on your computer
Open the upload folder
Transfer the contents of the upload folder to your subdomain root directory
-
CLI
Download the osTicket Awesome installation .zip to your computer
Use one of the above methods to transfer it to your subdomain root directory
Terminal# unzip osTicket-1.14.3-Awesome-101.zip # mv upload/* . # rm -r osTicket-1.14.3-Awesome-101.zip README.txt upload/
Copy ost-config.php from include/support-old to include
-
cPanel
Copy ost-config.php from support-old/include to include
-
Plesk
Copy ost-config.php from support-old/include to include
-
FTP
Download ost-config.php from support-old/include to your computer.
Now upload the same file to include
-
CLI
Terminal
# cp support-old/include/ost-config.php include
Go to www.support.your-domain.com/scp and log in
If required, complete the database upgrade process
Switch osTicket Awesome to Online (Admin Panel > Settings)
Now take a look at our post-installation tasks
I am responsible for an old osTicket system that someone else installed years ago. I was reluctant to upgrade it because their instructions are somewhat lacking and our data is mission critical. But then I found Awesome and these instructions. So easy! I’ve been putting off this update for months and I completed it in minutes. It was well worth the investment just for this tutorial alone!